本文最后更新于:1 个月前
SSM实现登录注册的小案例
SpringMVC+Spring+Mybatis
撰文目的:
进一步巩固自己对SSM的理解
为今后可能需要入门SSM的同事或同学作一个参考
涉及知识
java的注解、反射、代理
数据库的设计、增删改查、索引
Spring的IoC注入原理
SpringMVC与web交互
Mybatis代理Dao层
所需环境
一、数据库设计(SQL Server) 1.表的结构 表customers:
customer_id int 主键
customer_account varchar(20) 用户名
customer_passwd char(64) 密码哈希
message_id int 用户信息外键
表message:
message_id int 主键
message_email varchar(40) 邮箱
message_phone varchar(20) 电话
1
2
3
4
5
6
7
8
9
10
11
12
13
14
15
16
17
18
USE SpringSigninReg;CREATE TABLE messageINT NOT NULL PRIMARY KEY IDENTITY ,VARCHAR (40 ),VARCHAR (20 )CREATE TABLE customersINT NOT NULL PRIMARY KEY IDENTITY ,VARCHAR (20 ) NOT NULL ,CHAR (64 ) NOT NULL ,INT FOREIGN KEY REFERENCES message(message_id)INSERT message(message_email, message_phone)VALUES ('test@foxmail.com' ,'15115111511' );INSERT customers(customer_account,customer_passwd,message_id)VALUES ('test' ,'80dea37cccca5fb56b9b78dbe2733fb19e8ee2aa7bb03d4ac1e361fe3fad7b51' ,'1' );
2.查询优化: 需要频繁的根据账号customer_account查询用户,所以需要给它建立索引
1
2
CREATE INDEX idx_cuaccON customers(customer_account);
3.密码安全: 将密码经过sha256运算后存入,规避明文存储密码的风险
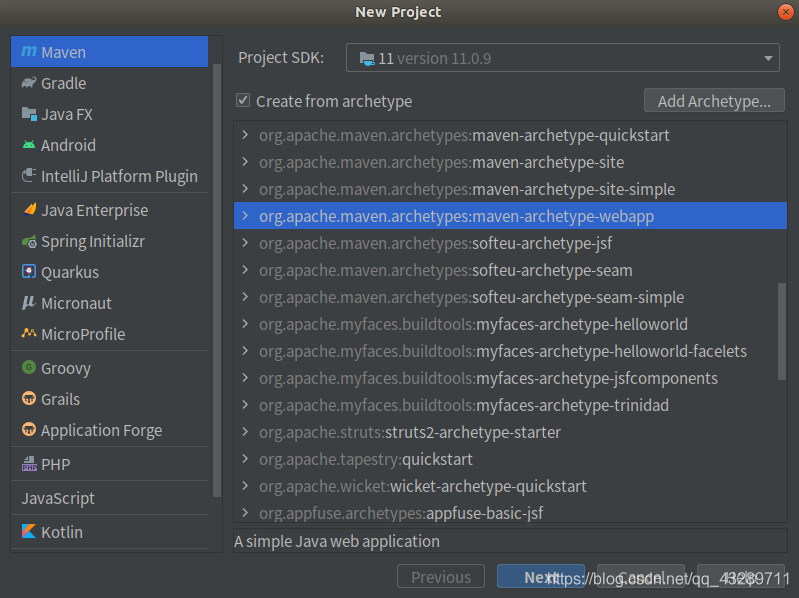
二、构建项目 1.新建maven项目 file->new->project->Maven->org.a…-webapp
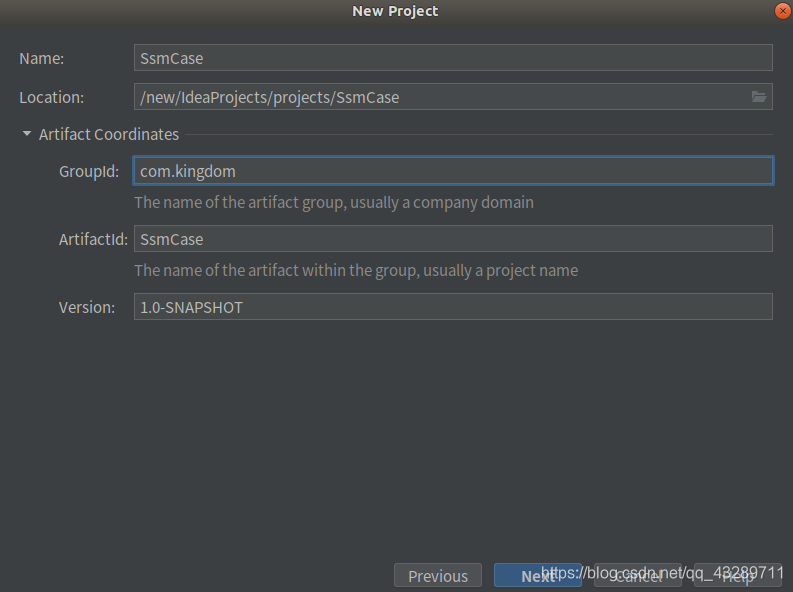
Name为项目名,GroupId一般取做公司名,其余不必更改
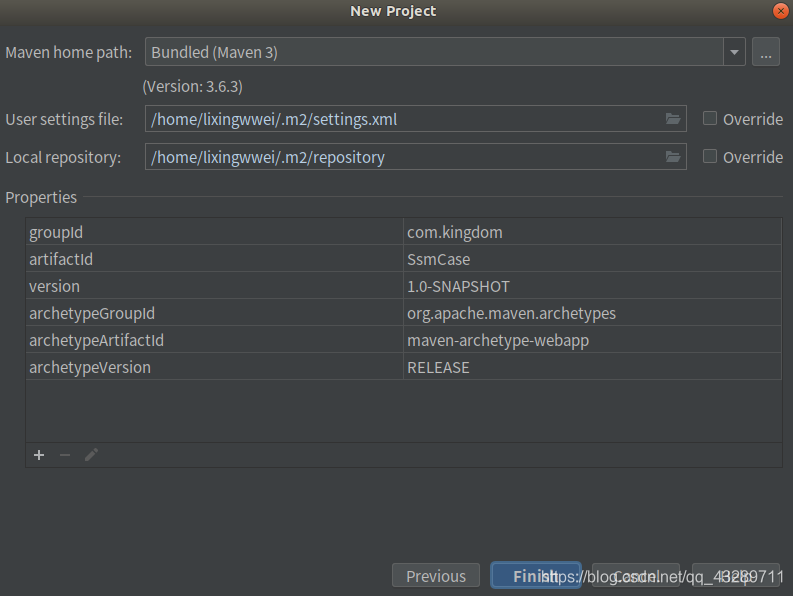
采用默认,直接finish
2.导入依赖 将pom.xml的相关依赖添加好,可以参考如下:
1
2
3
4
5
6
7
8
9
10
11
12
13
14
15
16
17
18
19
20
21
22
23
24
25
26
27
28
29
30
31
32
33
34
35
36
37
38
39
40
41
42
43
44
45
46
47
48
49
50
51
52
53
54
55
56
57
58
59
60
61
62
63
64
65
66
67
68
69
70
71
72
73
74
75
76
77
78
79
80
81
82
83
84
85
86
87
88
89
90
91
92
93
94
95
96
97
98
99
100
101
102
103
104
105
106
107
108
109
110
111
112
113
114
115
116
117
118
119
120
121
122
123
124
125
126
127
128
129
130
131
132
133
134
135
136
137
138
139
140
141
142
143
144
145
146
147
148
149
150
151
152
153
154
155
156
157
158
159
160
161
162
163
164
165
166
167
168
169
170
171
172
173
174
175
176
177
178
179
180
181
182
183
184
185
186
187
188
189
190
191
192
193
194
195
196
197
198
199
200
201
202
<?xml version="1.0" encoding="UTF-8"?> <project xmlns ="http://maven.apache.org/POM/4.0.0" xmlns:xsi ="http://www.w3.org/2001/XMLSchema-instance" xsi:schemaLocation ="http://maven.apache.org/POM/4.0.0 http://maven.apache.org/xsd/maven-4.0.0.xsd" > <modelVersion > 4.0.0</modelVersion > <groupId > com.kingdom</groupId > <artifactId > SsmCase</artifactId > <version > 1.0-SNAPSHOT</version > <packaging > war</packaging > <name > SsmCase Maven Webapp</name > <url > http://www.example.com</url > <properties > <project.build.sourceEncoding > UTF-8</project.build.sourceEncoding > <maven.compiler.source > 1.7</maven.compiler.source > <maven.compiler.target > 1.7</maven.compiler.target > <spring.version > 5.0.2.RELEASE</spring.version > <slf4j.version > 1.6.6</slf4j.version > <log4j.version > 1.2.12</log4j.version > <mybatis.version > 3.4.5</mybatis.version > </properties > <dependencies > <dependency > <groupId > org.aspectj</groupId > <artifactId > aspectjweaver</artifactId > <version > 1.6.8</version > </dependency > <dependency > <groupId > org.springframework</groupId > <artifactId > spring-aop</artifactId > <version > ${spring.version}</version > </dependency > <dependency > <groupId > org.springframework</groupId > <artifactId > spring-context</artifactId > <version > ${spring.version}</version > </dependency > <dependency > <groupId > org.springframework</groupId > <artifactId > spring-web</artifactId > <version > ${spring.version}</version > </dependency > <dependency > <groupId > org.springframework</groupId > <artifactId > spring-webmvc</artifactId > <version > ${spring.version}</version > </dependency > <dependency > <groupId > org.springframework</groupId > <artifactId > spring-test</artifactId > <version > ${spring.version}</version > </dependency > <dependency > <groupId > org.springframework</groupId > <artifactId > spring-tx</artifactId > <version > ${spring.version}</version > </dependency > <dependency > <groupId > org.springframework</groupId > <artifactId > spring-jdbc</artifactId > <version > ${spring.version}</version > </dependency > <dependency > <groupId > junit</groupId > <artifactId > junit</artifactId > <version > 4.12</version > <scope > test</scope > </dependency > <dependency > <groupId > com.microsoft.sqlserver</groupId > <artifactId > mssql-jdbc</artifactId > <version > 8.2.2.jre8</version > </dependency > <dependency > <groupId > javax.servlet</groupId > <artifactId > servlet-api</artifactId > <version > 2.5</version > <scope > provided</scope > </dependency > <dependency > <groupId > javax.servlet.jsp</groupId > <artifactId > jsp-api</artifactId > <version > 2.0</version > <scope > provided</scope > </dependency > <dependency > <groupId > jstl</groupId > <artifactId > jstl</artifactId > <version > 1.2</version > </dependency > <dependency > <groupId > log4j</groupId > <artifactId > log4j</artifactId > <version > ${log4j.version}</version > </dependency > <dependency > <groupId > org.slf4j</groupId > <artifactId > slf4j-api</artifactId > <version > ${slf4j.version}</version > </dependency > <dependency > <groupId > org.slf4j</groupId > <artifactId > slf4j-log4j12</artifactId > <version > ${slf4j.version}</version > </dependency > <dependency > <groupId > org.mybatis</groupId > <artifactId > mybatis</artifactId > <version > ${mybatis.version}</version > </dependency > <dependency > <groupId > org.mybatis</groupId > <artifactId > mybatis-spring</artifactId > <version > 1.3.0</version > </dependency > <dependency > <groupId > c3p0</groupId > <artifactId > c3p0</artifactId > <version > 0.9.1.2</version > <type > jar</type > <scope > compile</scope > </dependency > <dependency > <groupId > org.junit.jupiter</groupId > <artifactId > junit-jupiter</artifactId > <version > RELEASE</version > <scope > compile</scope > </dependency > </dependencies > <build > <finalName > SsmCase</finalName > <pluginManagement > <plugins > <plugin > <artifactId > maven-clean-plugin</artifactId > <version > 3.1.0</version > </plugin > <plugin > <artifactId > maven-resources-plugin</artifactId > <version > 3.0.2</version > </plugin > <plugin > <artifactId > maven-compiler-plugin</artifactId > <version > 3.8.0</version > </plugin > <plugin > <artifactId > maven-surefire-plugin</artifactId > <version > 2.22.1</version > </plugin > <plugin > <artifactId > maven-war-plugin</artifactId > <version > 3.2.2</version > </plugin > <plugin > <artifactId > maven-install-plugin</artifactId > <version > 2.5.2</version > </plugin > <plugin > <artifactId > maven-deploy-plugin</artifactId > <version > 2.8.2</version > </plugin > <plugin > <groupId > org.apache.tomcat.maven</groupId > <artifactId > tomcat7-maven-plugin</artifactId > <version > 2.2</version > <configuration > <port > 8081</port > <path > /</path > </configuration > </plugin > </plugins > </pluginManagement > </build > </project >
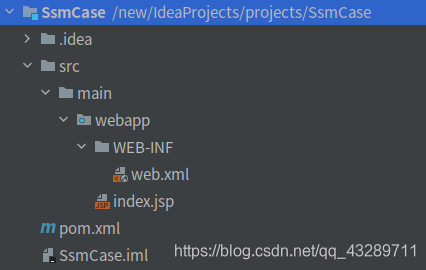
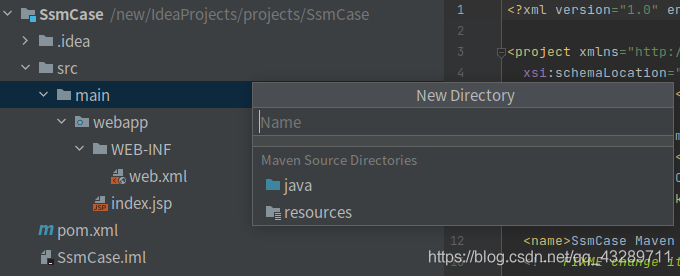
3.创建基本目录及文件 在main目录下面创建java和resources文件夹,并设置相应文件Source Root和Resource Root
创建类和接口
存放javabean的 domain 包下的用户类:com.kingdom.domain.Customers
数据访问层 dao 包下的用户 dao 接口:com.kingdom.dao.CustomersDao
业务层service包下的 CustomersService 接口:com.kingdom.service.CustomersService
业务层 service 包下的 service 实现类,继承service接口:com.kingdom.service.impl.CustomersServiceImpl
控制层controller包下的用户控制层CustomersController类:com.kingdom.controller.CustomersController
工具包util下用于安全加密的类:com.kingdom.util.Security
com.kingdom.domain.Customers 1 2 3 4 5 6 7 8 9 10 11 12 13 14 15 16 17 18 19 20 21 22 23 24 25 26 27 28 29 30 31 32 33 34 35 36 37 38 39 40 41 42 43 44 45 46 47 48 49 50 51 52 53 54 55 56 package com.kingdom.domain;public class Customers private Integer customer_id;private String customer_account;private String customer_passwd;private Integer message_id;public Integer getCustomer_id () return customer_id;public void setCustomer_id (Integer customer_id) this .customer_id = customer_id;public String getCustomer_account () return customer_account;public void setCustomer_account (String customer_account) this .customer_account = customer_account;public String getCustomer_passwd () return customer_passwd;public void setCustomer_passwd (String customer_passwd) this .customer_passwd = customer_passwd;public Integer getMessage_id () return message_id;public void setMessage_id (Integer message_id) this .message_id = message_id;@Override public String toString () return "Customers{" +"customer_id=" + customer_id +", customer_account='" + customer_account + '\'' +", customer_passwd='" + customer_passwd + '\'' +", message_id=" + message_id +'}' ;
1
2
3
4
5
6
7
8
9
10
11
package com.kingdom.dao;public class CustomersDao
1
2
3
4
5
6
7
8
9
10
11
12
13
package com.kingdom.service;public interface CustomersService public String testString ()
1
2
3
4
5
6
7
8
9
10
11
12
13
14
15
16
17
18
19
package com.kingdom.service.impl;import com.kingdom.service.CustomersService;import org.springframework.stereotype.Service;@Service("customersService") public class CustomersServiceImpl implements CustomersService @Override public String testString () return "Service层" ;
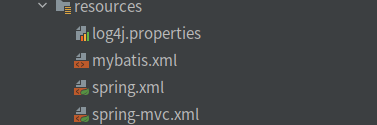
创建配置文件 在resources目录下新建以下文件:
spring相关配置:spring.xml
springmvc相关配置:spring-mvc.xml
mybatis相关配置:mybatis.xml
日志相关配置:log4j.properties
spring.xml 1 2 3 4 5 6 7 8 9 10 11 12 13 14 15 16 <?xml version="1.0" encoding="UTF-8"?> <beans xmlns ="http://www.springframework.org/schema/beans" xmlns:xsi ="http://www.w3.org/2001/XMLSchema-instance" xmlns:context ="http://www.springframework.org/schema/context" xmlns:aop ="http://www.springframework.org/schema/aop" xmlns:tx ="http://www.springframework.org/schema/tx" xsi:schemaLocation ="http://www.springframework.org/schema/beans http://www.springframework.org/schema/beans/spring-beans.xsd http://www.springframework.org/schema/context http://www.springframework.org/schema/context/spring-context.xsd http://www.springframework.org/schema/aop http://www.springframework.org/schema/aop/spring-aop.xsd http://www.springframework.org/schema/tx http://www.springframework.org/schema/tx/spring-tx.xsd" ></beans >
spring-mvc.xml 1 2 3 4 5 6 7 8 9 10 11 12 13 <?xml version="1.0" encoding="UTF-8"?> <beans xmlns ="http://www.springframework.org/schema/beans" xmlns:mvc ="http://www.springframework.org/schema/mvc" xmlns:context ="http://www.springframework.org/schema/context" xmlns:xsi ="http://www.w3.org/2001/XMLSchema-instance" xsi:schemaLocation ="http://www.springframework.org/schema/beans http://www.springframework.org/schema/beans/spring-beans.xsd http://www.springframework.org/schema/mvc http://www.springframework.org/schema/mvc/spring-mvc.xsd http://www.springframework.org/schema/context http://www.springframework.org/schema/context/spring-context.xsd" ></beans >
mybatis.xml 1 2 3 4 5 6 7 8 <?xml version="1.0" encoding="UTF-8"?> <!DOCTYPE configuration PUBLIC "-//mybatis.org//DTD Config 3.0//EN" "http://mybatis.org/dtd/mybatis-3-config.dtd" > <configuration > </configuration >
log4j.properties 1 2 3 4 5 6 7 8 9 10 11 12 13 14 15 16 17 18 15.15 t] %-5p %30.30 c %x - %m\n15.15 t] %-5p %30.30 c %x - %m\n
三、整合框架 1.Spring框架的使用
目的是为了使用IoC来管理实例,方便快捷的注入
1).配置spring.xml spring.xml中注解扫描,加上以下配置:
1 2 3 4 5 <context:component-scan base-package ="com.kingdom" > <context:exclude-filter type ="annotation" expression ="org.springframework.stereotype.Controller" /> </context:component-scan >
2).标记Service注解 将Service交由IoC管理:@Service("customersService")
1 2 @Service("customersService") public class CustomersServiceImpl implements CustomersService
3).测试Spring框架:
注意:前面类和接口中的代码均为最终代码,在未将Spring,Mybatis,SpringMVC全部配置好之前应将报错的地方全部注释掉,代替以简单的可以通过编译的代码
创建测试类:com.kingdom.test.springtest
1 2 3 4 5 6 7 8 9 10 11 12 13 14 15 16 17 18 19 20 21 22 23 package com.kingdom.test;import com.kingdom.service.CustomersService;import org.junit.jupiter.api.Test;import org.springframework.context.ApplicationContext;import org.springframework.context.annotation.ComponentScan;import org.springframework.context.support.ClassPathXmlApplicationContext;public class springtest @Test public void Test () new ClassPathXmlApplicationContext("classpath:spring.xml" );"customersService" );
运行Test()如能打印出Service层,则表示Spring的IoC容器配置成功
2.配置SpringMVC
目的是通过controller来响应http请求
1).配置web.xml
配置前端控制器
加载spring-mvc.xml配置文件
启动服务器,创建Servlet
配置过滤器解决中文乱码1 2 3 4 5 6 7 8 9 10 11 12 13 14 15 16 17 18 19 20 21 22 23 24 25 26 27 28 29 30 31 32 33 34 35 36 37 38 39 <!DOCTYPE web-app PUBLIC "-//Sun Microsystems, Inc.//DTD Web Application 2.3//EN" "http://java.sun.com/dtd/web-app_2_3.dtd" > <web-app xmlns ="http://xmlns.jcp.org/xml/ns/javaee" xmlns:xsi ="http://www.w3.org/2001/XMLSchema-instance" xsi:schemaLocation ="http://xmlns.jcp.org/xml/ns/javaee http://xmlns.jcp.org/xml/ns/javaee/web-app_4_0.xsd" version ="4.0" > <servlet > <servlet-name > dispatcherServlet</servlet-name > <servlet-class > org.springframework.web.servlet.DispatcherServlet</servlet-class > <init-param > <param-name > contextConfigLocation</param-name > <param-value > classpath:spring-mvc.xml</param-value > </init-param > <load-on-startup > 1</load-on-startup > </servlet > <servlet-mapping > <servlet-name > dispatcherServlet</servlet-name > <url-pattern > /</url-pattern > </servlet-mapping > <filter > <filter-name > characterEncodingFilter</filter-name > <filter-class > org.springframework.web.filter.CharacterEncodingFilter</filter-class > <init-param > <param-name > encoding</param-name > <param-value > UTF-8</param-value > </init-param > </filter > <filter-mapping > <filter-name > characterEncodingFilter</filter-name > <url-pattern > /*</url-pattern > </filter-mapping > </web-app >
2).配置spring-mvc.xml
开启注解扫描,只扫描 controller
配置视图解析器
开启SpringMVC注解支持1 2 3 4 5 6 7 8 9 10 11 12 13 14 15 16 17 18 19 20 21 22 23 24 25 <?xml version="1.0" encoding="UTF-8"?> <beans xmlns ="http://www.springframework.org/schema/beans" xmlns:mvc ="http://www.springframework.org/schema/mvc" xmlns:context ="http://www.springframework.org/schema/context" xmlns:xsi ="http://www.w3.org/2001/XMLSchema-instance" xsi:schemaLocation ="http://www.springframework.org/schema/beans http://www.springframework.org/schema/beans/spring-beans.xsd http://www.springframework.org/schema/mvc http://www.springframework.org/schema/mvc/spring-mvc.xsd http://www.springframework.org/schema/context http://www.springframework.org/schema/context/spring-context.xsd" ><context:component-scan base-package ="com.kingdom" > <context:include-filter type ="annotation" expression ="org.springframework.stereotype.Controller" /> </context:component-scan > <bean id ="internalResourceViewResolver" class ="org.springframework.web.servlet.view.InternalResourceViewResolver" > <property name ="prefix" value ="/WEB-INF/pages/" /> <property name ="suffix" value =".jsp" /> </bean > <mvc:annotation-driven /> </beans >
3).测试SpringMVC框架
编写用户控制层controller:com.kingdom.controller.CustomersController
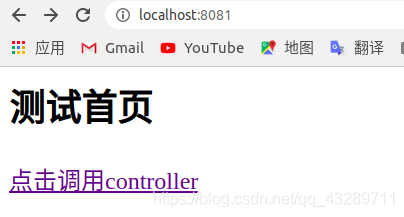
编写index.jsp页面
编写跳转页面test.jsp
启动tomcat,tomcat会加载出index.jsp,点击测试链接,发送请求到controller,controller将test.jsp返回给浏览器,启动tomcat的方式为;mvn tomcat7:run
controller:
1 2 3 4 5 6 7 8 9 10 11 12 13 14 15 16 17 18 19 20 package com.kingdom.controller;import org.springframework.stereotype.Controller;import org.springframework.web.bind.annotation.RequestMapping;@Controller @RequestMapping("/customers") public class CustomersController @RequestMapping("/test") public String index () "controller:测试" );return "test" ;
/webapp/index.jsp内容如下:
1 2 3 4 5 6 7 <%@ page contentType="text/html;charset=UTF-8" language="java" %><html > <body > <h2 > 测试首页</h2 > <a href ="/customers/test" > 点击调用controller</a > </body > </html >
/webapp/WEB-INF/pages/test.jsp内容如下:
1 2 3 4 5 6 7 8 9 <%@ page contentType="text/html;charset=UTF-8" language="java" %><html > <head > <title > 测试</title > </head > <body > <h1 > 测试</h1 > </body > </html >
3.整合Spring和SpringMVC
目的是为了让controller可以调用service
1).配置web.xml 将以下配置加入<web-app>标签中:
1 2 3 4 5 6 7 8 9 <listener > <listener-class > org.springframework.web.context.ContextLoaderListener</listener-class > </listener > <context-param > <param-name > contextConfigLocation</param-name > <param-value > classpath:spring.xml</param-value > </context-param >
2).将service注入到controller 将controller修改成以下:
1 2 3 4 5 6 7 8 9 10 11 12 13 14 15 16 17 18 19 20 21 22 23 24 25 26 package com.kingdom.controller;import com.kingdom.service.CustomersService;import org.springframework.beans.factory.annotation.Autowired;import org.springframework.stereotype.Controller;import org.springframework.web.bind.annotation.RequestMapping;@Controller @RequestMapping("/customers") public class CustomersController @Autowired private CustomersService customersService;@RequestMapping("/test") public String index () "controller:测试" );":测试" );return "test" ;
3).测试controller调用service注入 像测试SpringMVC那样启动tomcat,然后点击链接,查看控制台是否打印如下内容:
4.配置Mybatis框架
目的是为了jdk动态代理dao层,根据sql语句向数据库交互数据
1).配置mybatis.xml 1 2 3 4 5 6 7 8 9 10 11 12 13 14 15 16 17 18 19 20 21 22 23 <?xml version="1.0" encoding="UTF-8"?> <!DOCTYPE configuration PUBLIC "-//mybatis.org//DTD Config 3.0//EN" "http://mybatis.org/dtd/mybatis-3-config.dtd" > <configuration > <environments default ="development" > <environment id ="development" > <transactionManager type ="JDBC" /> <dataSource type ="POOLED" > <property name ="url" value ="jdbc:sqlserver://localhost:1433" /> <property name ="driver" value ="com.microsoft.sqlserver.jdbc.SQLServerDriver" /> <property name ="username" value ="SA" /> <property name ="password" value ="123@abcABC" /> </dataSource > </environment > </environments > <mappers > <package name ="com.kingdom.dao" /> </mappers > </configuration >
2).编写dao层 注意dao层是只用写接口即可,mybatis框架会动态代理dao接口
1 2 3 4 5 6 7 8 9 10 11 12 13 14 15 16 17 18 package com.kingdom.dao;import com.kingdom.domain.Customers;import org.apache.ibatis.annotations.Select;import java.util.List;public interface CustomersDao @Select("use SpringSigninReg select * from customers") public List<Customers> findCustomers ()
3).测试Mybatis 编写测试类:com.kingdom.test.mybatistest
1 2 3 4 5 6 7 8 9 10 11 12 13 14 15 16 17 18 19 20 21 22 23 24 25 26 27 28 29 30 31 32 33 34 35 36 37 38 39 40 41 42 43 44 45 package com.kingdom.test;import com.kingdom.dao.CustomersDao;import com.kingdom.domain.Customers;import org.apache.ibatis.io.Resources;import org.apache.ibatis.session.SqlSession;import org.apache.ibatis.session.SqlSessionFactory;import org.apache.ibatis.session.SqlSessionFactoryBuilder;import org.junit.jupiter.api.Test;import java.io.InputStream;import java.util.List;public class mybatistest @Test public void run1 () throws Exception "mybatis.xml" );new SqlSessionFactoryBuilder().build(in);for (Customers cu : list){
5.整合Mybatis到SpringMVC-Spring
目的是快捷的与数据库交互,能将数据库数据与bean对应起来
1).配置spring.xml
配置连接池
配置SqlSessionFactory工厂
配置UsersDao接口所在包
将以下内容添加到spring.xml的<beans>标签里,它的作用mybatis.xml的功能是一样的,只不过这样就让Spring来加载Mybatis,之后就不会再用到mybatis.xml了。
1 2 3 4 5 6 7 8 9 10 11 12 13 14 15 16 17 18 <bean id ="dataSource" class ="com.mchange.v2.c3p0.ComboPooledDataSource" > <property name ="driverClass" value ="com.microsoft.sqlserver.jdbc.SQLServerDriver" /> <property name ="jdbcUrl" value ="jdbc:sqlserver://localhost:1433" /> <property name ="user" value ="SA" /> <property name ="password" value ="123@abcABC" /> </bean > <bean id ="sqlSessionFactory" class ="org.mybatis.spring.SqlSessionFactoryBean" > <property name ="dataSource" ref ="dataSource" /> </bean > <bean id ="mapperScanner" class ="org.mybatis.spring.mapper.MapperScannerConfigurer" > <property name ="basePackage" value ="com.kingdom.dao" /> </bean >
2).注解标记dao 使用@Repository标记dao,它可以让Spring扫描到它,然后其动态代理生成的实例交由IoC容器来管理
1 2 @Repository public interface CustomersDao
3).将dao注入到service 1 2 3 4 5 6 7 8 9 10 11 @Service("customersService") public class CustomersServiceImpl implements CustomersService @Autowired private CustomersDao customersDao;@Override public String testString () return "Service层" ;
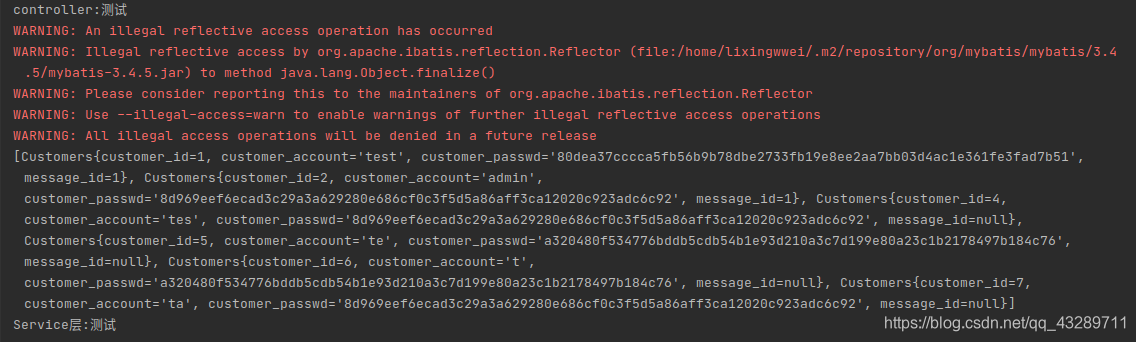
4).测试SpringMVC-Spring-Mybatis 还是和测试SpringMVC时一样,先启动tomcat,然后点击链接测试,如果后台能将从数据库查到的数据打印出来,则配置成功
至此,SSM(SpringMVC+Spring+Mybatis)已经整合完毕,可以自己写开发代码了
四、实现登录注册功能 我们需要做的是:前端页面发来请求或数据,后端接收请求和数据,对数据进行处理操作(可能会操作数据库),然后在对请求做出响应,完成交互。
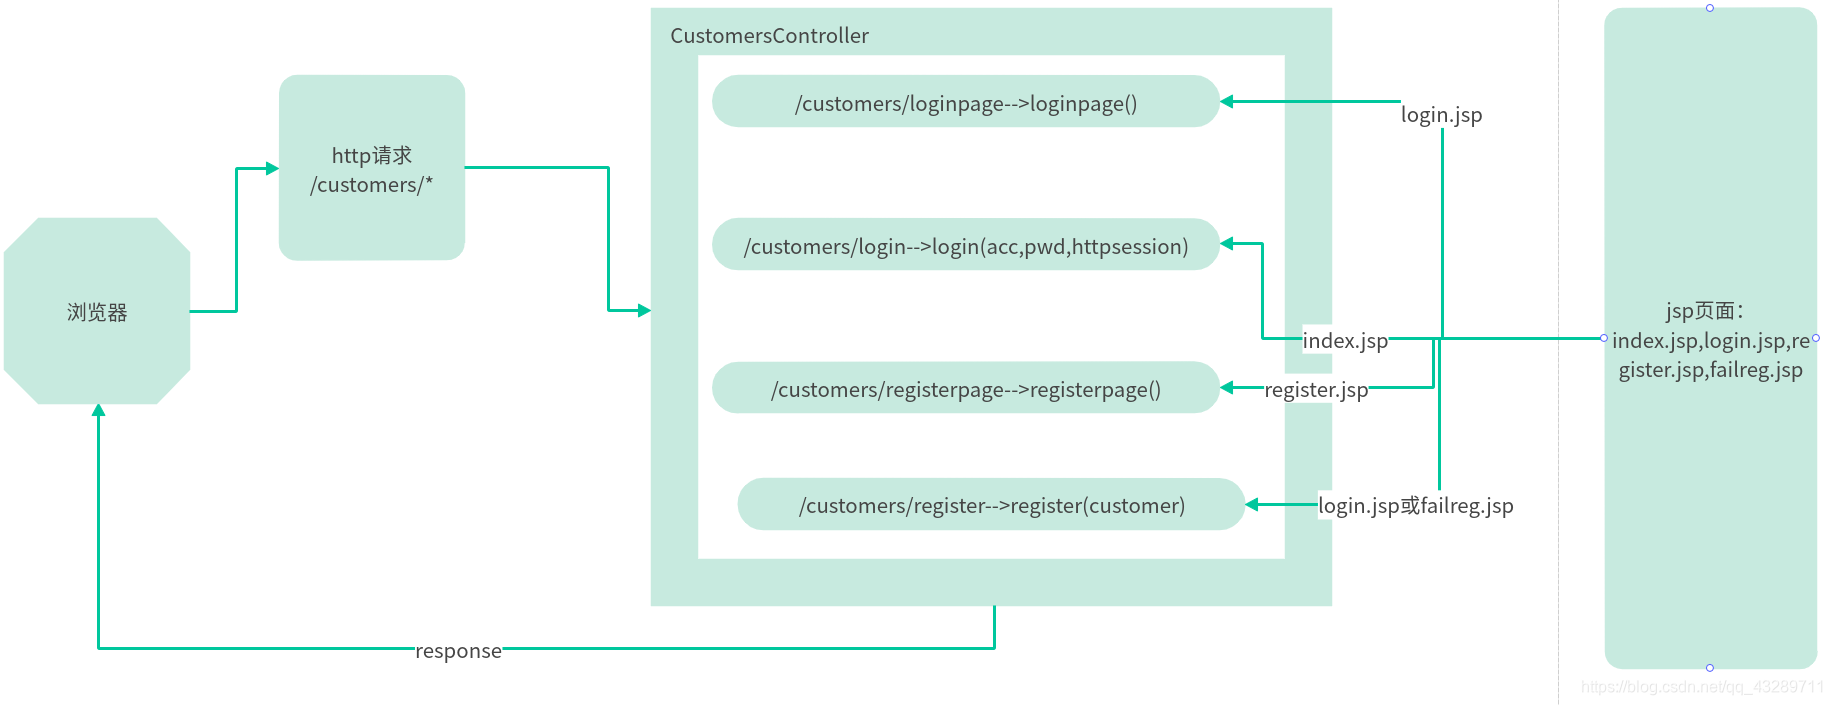
1.controller层 com.kingdom.controller.CustomersController编写如下:
1 2 3 4 5 6 7 8 9 10 11 12 13 14 15 16 17 18 19 20 21 22 23 24 25 26 27 28 29 30 31 32 33 34 35 36 37 38 39 @Controller @RequestMapping("/customers") public class CustomersController @Autowired private CustomersService customersService;@RequestMapping("/loginpage") public String loginpage () return "login" ;@RequestMapping("/login") public String login (@RequestParam("account") String acc, @RequestParam("pwd") String pwd, HttpSession session) if (aCuterFromDB!=null ){"customer" ,aCuterFromDB);return "index" ;@RequestMapping("/registerpage") public String registerpage () return "register" ;@RequestMapping("/register") public String register (Customers customers) "!!!!!!!!!!!!!!!!!!!!!!!!!!!!!!" );if (customersService.addCustomer(customers))return "redirect:/customers/loginpage" ;else return "failreg" ;@RequestMapping("/index") public String index () return "index" ;
2.service层 com.kingdom.service.CustomersService
1 2 3 4 public interface CustomersService Customers login (String acc,String pwd) ;boolean addCustomer (Customers customers)
com.kingdom.service.impl.CustomersServiceImpl
1 2 3 4 5 6 7 8 9 10 11 12 13 14 15 16 17 18 19 20 21 22 23 24 25 26 27 28 29 30 31 32 33 34 35 36 37 38 39 40 41 42 43 44 45 46 @Service("customersService") public class CustomersServiceImpl implements CustomersService @Autowired private CustomersDao customersDao;@Override public Customers login (String acc, String pwd) if (aCuter!=null &&aCuter.getCustomer_account().equals(acc)){if (encryptPwd!=null &&encryptPwd.equals(aCuter.getCustomer_passwd())){return aCuter;else return null ;else return null ;@Override public boolean addCustomer (Customers customers) if (aCuter!=null &&aCuter.getCustomer_account().equals(customers.getCustomer_account()))return false ;try {catch (Exception e){return false ;return true ;
3.dao层 com.kingdom.dao.CustomersDao
1 2 3 4 5 6 7 8 9 10 11 12 13 14 15 16 @Repository public interface CustomersDao @Select("use SpringSigninReg select * from customers") public List<Customers> findCustomers () @Select("USE SpringSigninReg SELECT * FROM customers WHERE customer_account=#{customer_account}") public Customers returnCustomerByAccount (@Param("customer_account") String customer_account) @Options(useGeneratedKeys = true, keyProperty = "customer_id", keyColumn = "customer_id") @Select("USE SpringSigninReg INSERT INTO customers(customer_account,customer_passwd,message_id) VALUES(#{customers.customer_account},#{customers.customer_passwd},#{customers.message_id})") public void newCustomer (@Param("customers") Customers customers)
4.工具类(用于加密) com.kingdom.util.Security
1 2 3 4 5 6 7 8 9 10 11 12 13 14 15 16 17 18 19 20 21 22 23 24 25 26 27 28 29 30 31 32 33 34 35 36 37 public class Security @Test void test () "123456" ));public static String sha256 (String str) "" ;try {"SHA-256" );"UTF-8" ));catch (NoSuchAlgorithmException e) {catch (UnsupportedEncodingException e) {return encodeStr;private static String byte2Hex (byte [] digest) new StringBuffer();null ;for (int i=0 ;i<digest.length;i++){0xFF );if (temp.length()==1 ){"0" );return stringBuffer.toString();
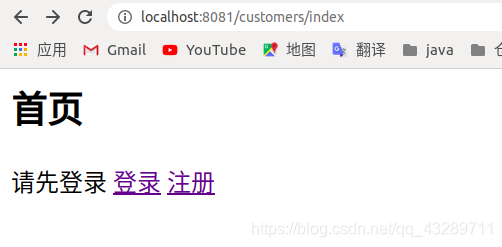
最后启动运行 进入Terminal终端窗口,输入mvn tomcat7:run启动tomcat,tomcat会根据它的web.xml来加载SpringMVC和Spring,SpringMVC会根据它的spring-mvc.xml来加载,然后Spring又会根据spring.xml来加载,spring.xml有Mybatis和Spring整合的配置,从而会加载Mybatis.
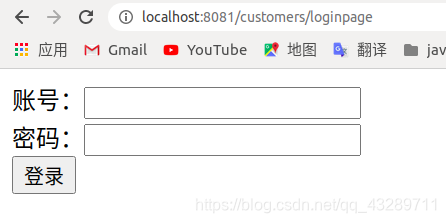
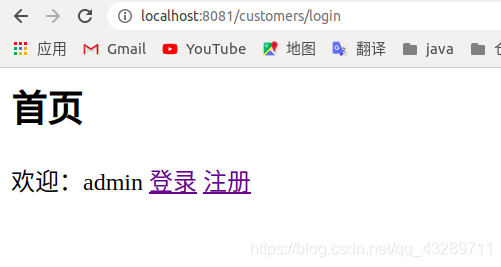
运行效果